Tag: project management

Using Zapier to import GitHub issues into OmniFocus

I use OmniFocus for personal task-tracking and Zapier to automate work when possible.  I also coordinate open source work on GitHub. Recently I was wondering if there was a way to make OmniFocus automatically import any GitHub issue assigned to me. It turns out there is!

What you need:

Optional tools include Hazel or Lingon to automate the running of the ParseInbox applescript.

Before I continue, thank you to Joe Buhling for sharing his collection of OmniFocus scripts!

Part One: Create zap on Zapier

If you haven’t already, enable OmniSync and create a Mail Drop email address. You’ll also need a GitHub account and there should be a newly created issue assigned to you.

To get started, while logged into Zapier, click MAKE A ZAP! button.

Step 1: GitHub app, new issue trigger

Select GitHub as the trigger app:

Screen capture of selecting "GitHub" as trigger app.
Select “GitHub” as trigger app.

Next, select New Issue as the GitHub trigger:
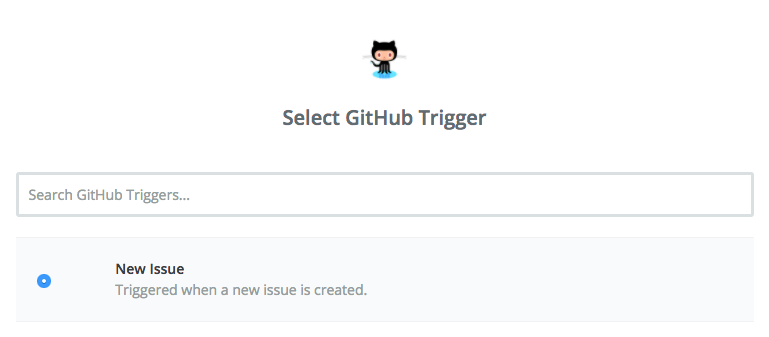
Screen capture of selecting "new issue" as GitHub trigger.
Select “new issue” as GitHub trigger.

Next, set up the GitHub new issue trigger according to your preferences:
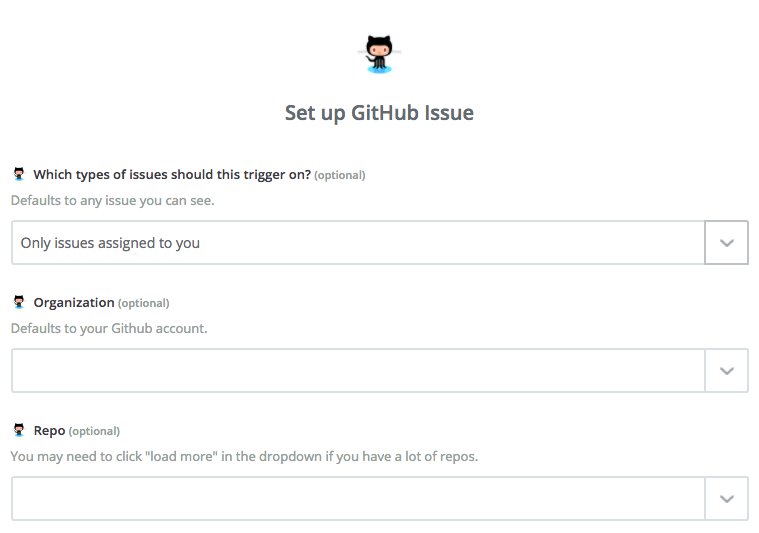
Screen capture of setting up GitHub issue trigger according to your preferences.
Set up GitHub issue trigger according to your preferences.

In my Zap, I’ve selected Only issues assigned to you and for the time being, I’ve limited it to a single GitHub organization. What you select is up to you.

Next, test this step to ensure it is retrieving the data from GitHub that you expect it to. Before you run the test, Zapier will remind you to have a recently created issue that matches your trigger options:
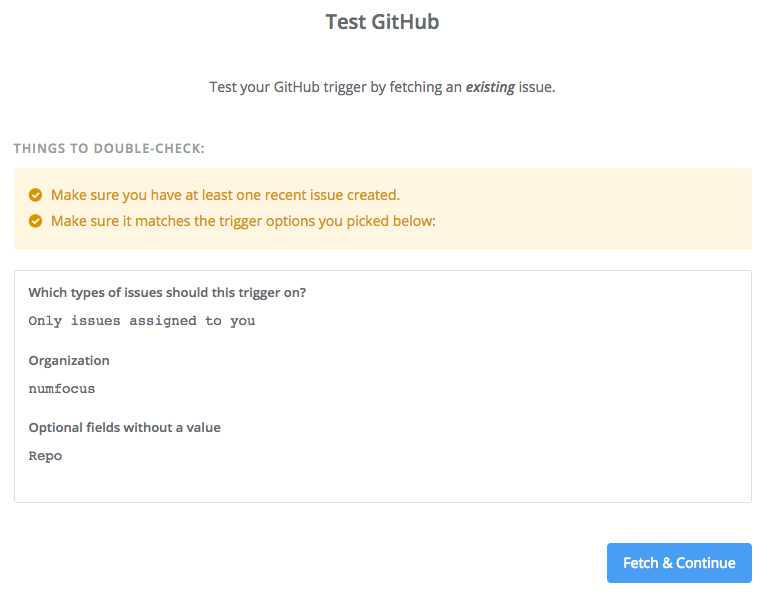
Screen capture of testing your GitHub new issue trigger.
Test your GitHub new issue trigger.

Once everything looks good, save the step.

Next, you’ll create a formatter step to format any dates attached to GitHub issues via their assigned milestones.

Step 2: Formatter app, date/time action

The app you’ll select for this 2nd step is Formatter by Zapier:
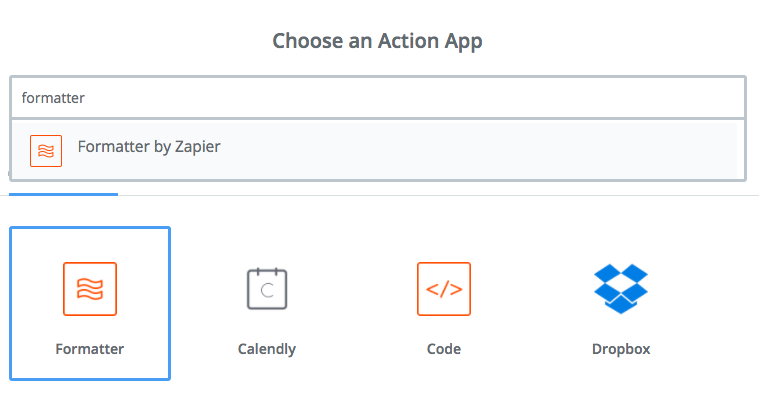
Screen capture of selecting step 2 app as Formatter by Zapier
Step 2 app is Formatter by Zapier.

The action you’ll use for Formatter is Date / Time:
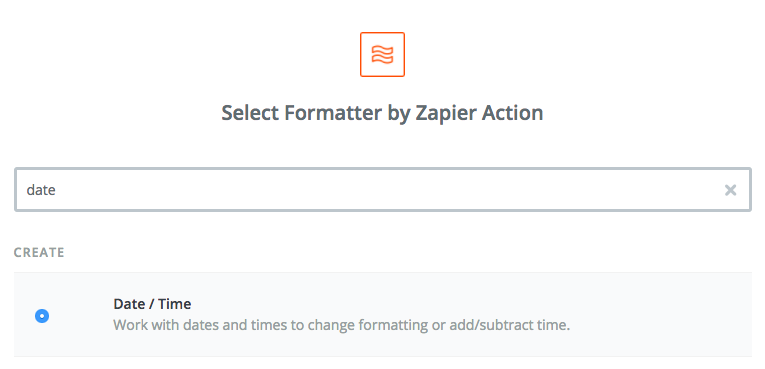
Screen capture of using the date action for app Formatter.
Use the date action for app Formatter.

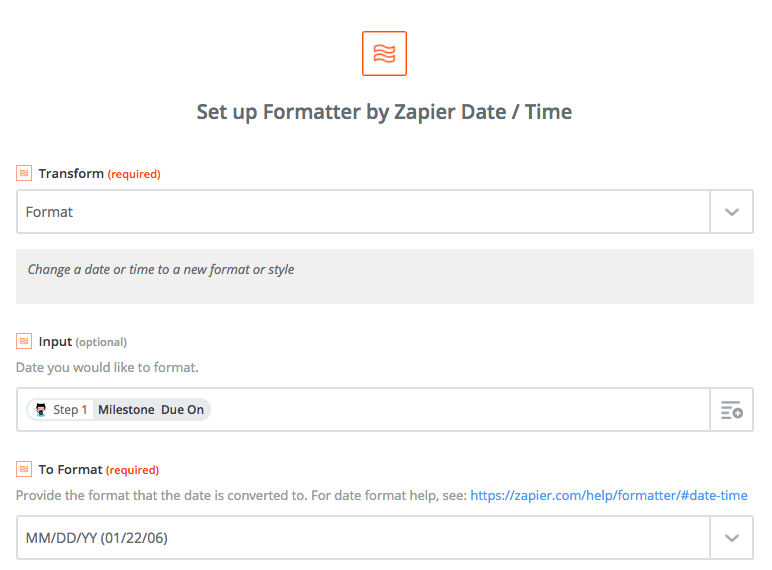
Next, set up the Date / Time action. You’ll want to set the following fields accordingly:

  • Transform: Format
  • Input: Step 1 Milestone Due On
  • To Format: MM/DD/YY
Screen capture of configuring date transform.
Configure date transform action.

Now test the action to ensure the result is as you expect. You’ll see something like:
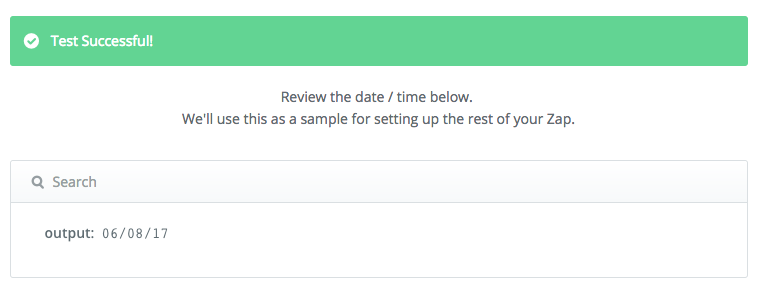
Test results for date formatter action.

Once everything looks good, save the step.

Step 3: Code by Zapier app, run Python action

In this step, I’m using Python code to map GitHub repository names to OmniFocus folders and GitHub milestones to OmniFocus projects within those folders. If you have a different organizational scheme, you’ll want to modify the code in this step accordingly.

First, select the Code by Zapier app:
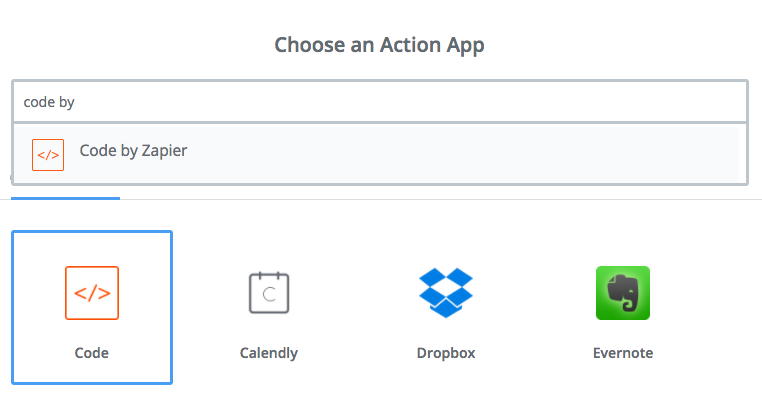
For Step 3, select the Code by Zapier app.

Next, select Run Python as the Code by Zapier action:
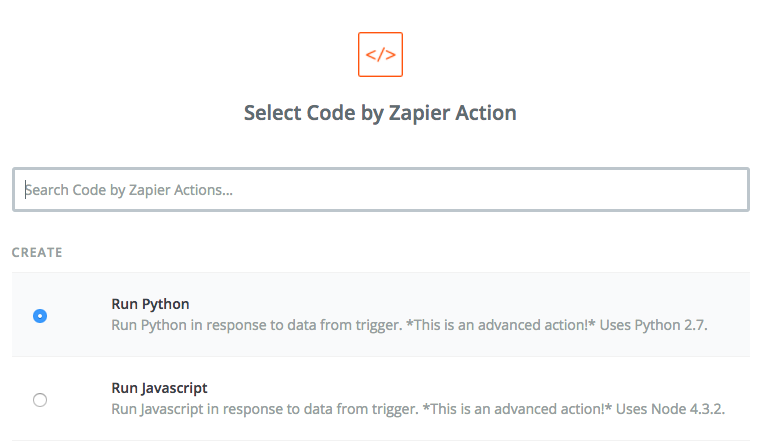
Select Run Python as Code by Zapier action.

(You could also select Run Javascript and re-write the Python code below in Javascript.)

Next, configure the Input Data for use with our custom python code. You’ll want to set the following:

  • repo: Step 1: Repository Name
  • milestone: Step 1: Milestone Title

The names of the fields on the left doesn’t really matter, but it must match the key names we’ll use in our Python code.
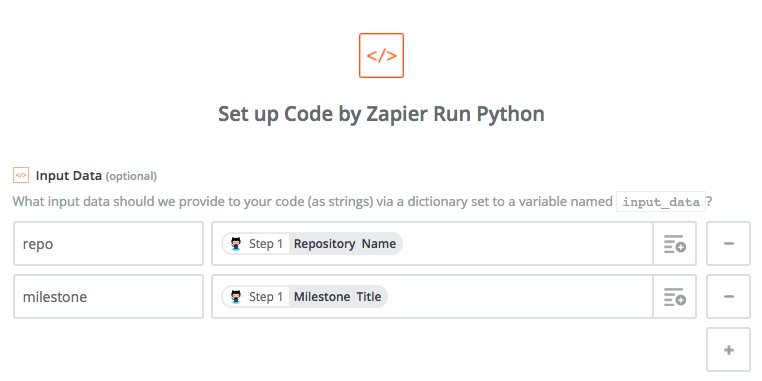
Configure input data for custom python code.

Next, you’ll enter the following Python code into the Code field:

# want to set the project as
# repo milestone
# or just repo if no milestone

output = {'project' : input_data.get('repo').replace("-", " ")}

if input_data.get('milestone'):
    repo = input_data.get('repo')
    milestone = input_data.get('milestone')
    project = repo.replace("-", " ") + ' ' + milestone.replace("-", " ")
    output = {'project' : project}

If the issue being processed by Zapier has a milestone, this code sets project to Repository name milestone name, replacing any hyphens with spaces. Otherwise, it sets project to simply Repository name, also replacing any hyphens with spaces.

This works for me because I organize NumFOCUS projects in GitHub like this:

  • [repository] my-project
    • [milestone] milestone 1
    • [milestone] milestone 2

And in OmniFocus, I organize projects like this:

  • [folder] My Project
    • [project] Milestone 1
    • [project] Milestone 2

If you structure your projects differently, you’ll need to update the Python code above accordingly.

When you’re ready, test the Python code and check to see that it creates the expected output:
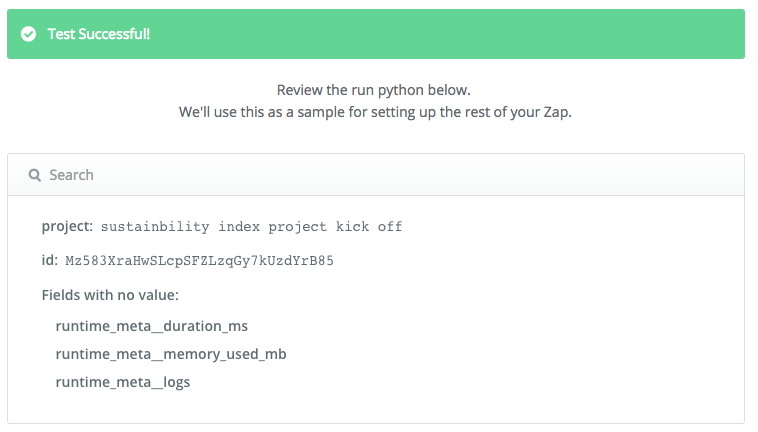
Results of testing custom Python code.

When everything looks good, save this step and continue on to creating the 4th and final step.

Step 4: OmniFocus app, create task action

In this last step you’ll configure the OmniFocus app to create an OmniFocus task with information from the retrieved GitHub issue.

First, select the OmniFocus app:
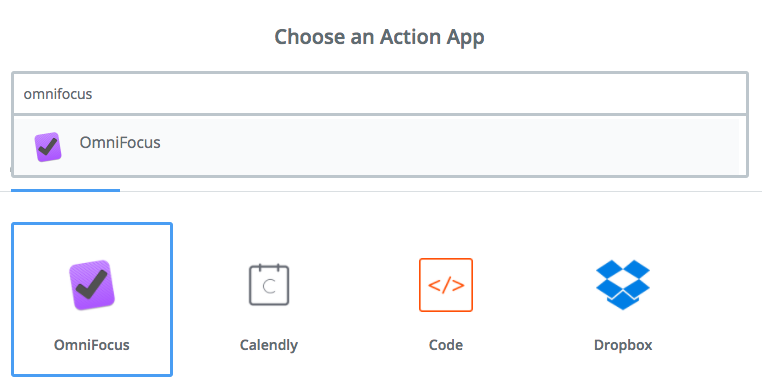
Select OmniFocus app for Step 4.

Now select the Create Task action for the OmniFocus app:
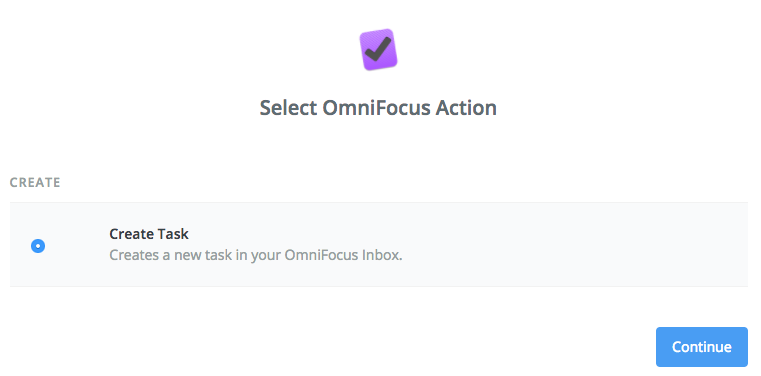
Select create task action for OmniFocus app.

Next you’ll need to connect your OmniFocus account if you haven’t already and select which connection you’d like to use.

Next, set up the create task action. You’ll configure only the Title field as such:

--Step 1 Title @GitHub ::Step 3 Project #Step 2 Output //Step 1 Html Url

Let’s break this down:

  • The -- sets the name of the task.
  • The @ sets the context.
  • The:: sets the the name of the project.
  • The# sets the due date.
  • The// sets the text of the note.

Two notes:

  • The name of the project is fuzzy matched against flatted name of folders and projects, so you don’t need to use a colon between folder and project name.
  • With the applescript I’m using to parse OmniFocus’ Inbox, I had trouble with dates including time, so this is why I simplify the due date format in Step 2 of the Zap.
  • If you wanted to dynamically set the name of the context based on some attribute of the GitHub issue (e.g. label), you could do that by modifying the Run Python action in Step 3.

For details on the syntax used for parsing the inbox, see this post.

Here’s what the the task looks like in Zapier:
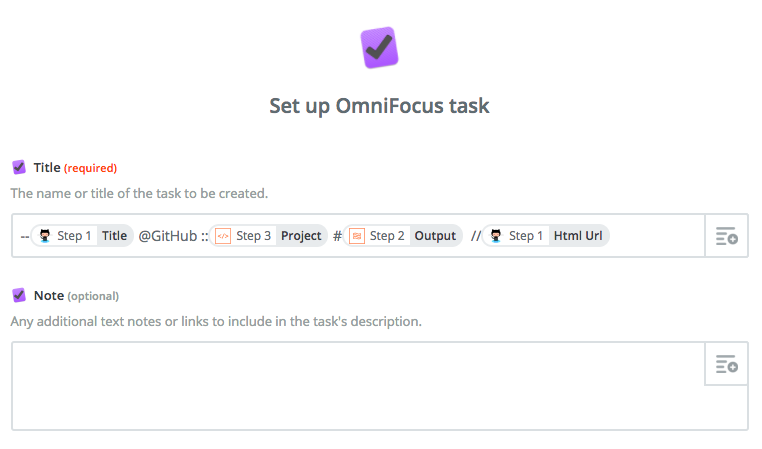
Configure create task omnifocus action.
Configure create task OmniFocus action.

As always, test the action before proceeding to make sure everything looks right:
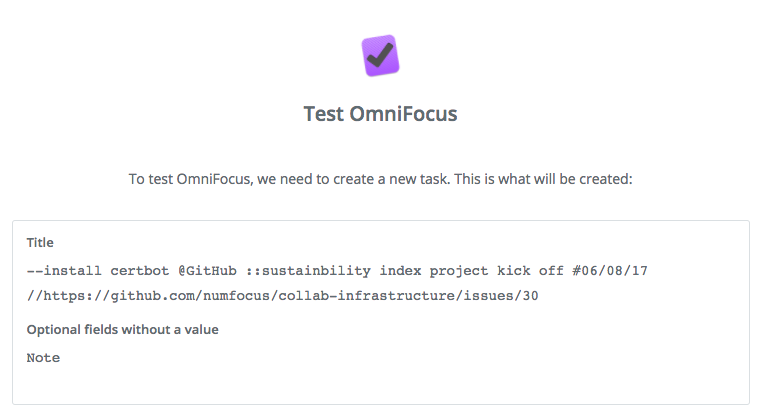
Test create task OmniFocus action.

If this looks good, click Create & Continue to create the task. Once you do this, flip over to OmniFocus and wait for the task to appear in your Inbox. It’ll look something like this:

New task in OmniFocus Inbox.

Now you’re ready to setup the script to parse that monster-looking task out of your OmniFocus Inbox and into the right spot!

Part 2: Parsing tasks in OmniFocus’ Inbox

Step 1: Manually run the ParseInbox script

For this part, if you haven’t already, you’ll want to grab a copy of the AutoParser scripts from either the original author or myself.

The repositories linked to above contain a collection of applescripts for use with OmniFocus. (Thank you Joe Buhling for putting these together!)

There are two main options for running the script manually.

Option 1: You can run any of the scripts from the command line with the osascript command:

/usr/bin/osascript "/Users/christie/Bin/OFScripts/Auto-Parser/ParseInbox.applescript"

Option 2: If you don’t want to use the command line to run scripts, you can copy the ParseInbox.applescript into OmniFocus’ scripts folder. To find out where this is, go to Help > Open Scripts Folder in OmniFocus and it will open a new finder window at that location. Once you do this, you’ll see Script: ParseInbox as an option in the View > Customize Toolbar… window. Drag this icon to your toolbar for ease of use.

When you run the ParseInbox script, it will transform the Inbox task Zapier created that looks like this:

--install certbot @GitHub ::sustainbility index project kick off #06/08/17 //https://github.com/numfocus/collab-infrastructure/issues/30

Into the task install certbot, belonging to the project Project Kick Off in the folder Sustainability Index. The task will now have a due date of 6/8/2017, and note text that includes a link back to the original GitHub issue:

Task in OmniFocus after it has been parsed from Inbox.

If at this point you realize that your Zap isn’t quite configured correctly or exactly how you want it, you can go back and adjust it. And, if you get tired of waiting for OmniFocus to sync with the server to retrieve the new task, just remember you can copy and paste the test output from Step 4 of your Zap.

Step 2 (optional): Automatically running ParseInbox

This step is totally optional and you can skip it if you’re happy manually running the script when you want to parse Inbox items.

However, if you don’t want to have to remember to do this, or if you want OmniFocus to be able to process Inbox items while you’re out and about, then you’ll want to automate it.

There are a few options for doing this. They all require your computer be on, but OmniFocus doesn’t have to be open (the script will open it if closed).

Option 1 is to use Hazel to run the script when your OmniFocus has been updated. Joe explains how to configure this option on his blog here. I had mixed results with this method. The script seemed to run sometime and not others. YMMV.

Option 2 is to schedule the script using launchd (macOS’s version of cron). This involves editing plist files, which I hate doing, so I bought Lingon X to make this easy.

Here’s what my settings for Lingon look like:
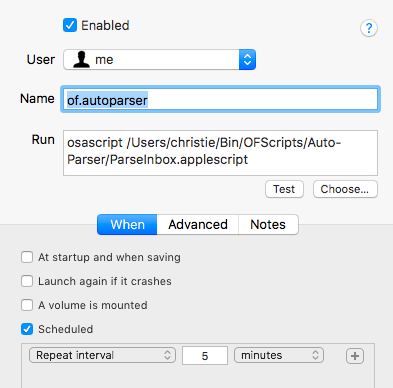
Lingon settings for scheduling ParseInbox script.

And the plist generated by Lingon looks like this:

<?xml version="1.0" encoding="UTF-8"?>
<!DOCTYPE plist PUBLIC "-//Apple//DTD PLIST 1.0//EN" "http://www.apple.com/DTDs/PropertyList-1.0.dtd">
<plist version="1.0">
<dict>
	<key>EnvironmentVariables</key>
	<dict>
		<key>PATH</key>
		<string>/usr/local/bin:/usr/bin:/bin:/usr/sbin:/sbin:/usr/local/MacGPG2/bin:/usr/local/sbin</string>
	</dict>
	<key>Label</key>
	<string>of.autoparser</string>
	<key>ProgramArguments</key>
	<array>
		<string>/usr/bin/osascript</string>
		<string>/Users/christie/Bin/OFScripts/Auto-Parser/ParseInbox.applescript</string>
	</array>
	<key>StartInterval</key>
	<integer>300</integer>
</dict>
</plist>


Strategies for Facilitating Better Meetings

As part of my work with Mozilla and Stumptown Syndicate, I attend a lot of meetings and many of those I am responsible for facilitating.

I think most people consider meetings to be necessary evils. Meetings are often time-consuming, inefficient and take us away from real work we need to be doing, and yet they seem unavoidable. It’s probably true that we can’t get away with eliminating meetings all together. Sometimes you just have to get everyone in a “room” together to hash out some issue.

However, I think we can work towards having more efficient meetings and below are some strategies I’ve learned for doing so.

Designate a Facilitator

The facilitator is usually the “driver” of the meeting. She helps the group understand and achieve their objective(s), assists the group in following the agenda and staying on schedule. The facilitator should ensure that notes are taken. Often, but not always, the facilitator is the person who initiates and schedules the meetings (by sending out the meeting invite).

Have a Clear, Obtainable Objective

Before the meeting (ideally when the meeting is scheduled), an objective (or set of objectives) for the meeting should be drafted and communicated to the entire group. The objective should follow SMART criteria: specific, measurable, attainable, relevant and time-bound. If you are meeting to make a series of decisions, state what specific decisions need to be made.

Create and Distribute an Agenda

Having an agenda is essential for keeping a meeting focused and timely. Whenever possible, circulate the agenda ahead of time so attendees can: a) determine the important of their presence at the meeting and prioritize their schedule accordingly, and b) prepare for the meeting.

In agendas I draft, I always include the following:

(Descriptive) Meeting Title & Date

== Objective ==
== Attendees ==
== Agenda / Notes ==
== Action Items ==

Did you note my use of wiki syntax? Not a coincidence! If you’re using a wiki in your organization, writing notes and agendas in wiki syntax makes recording of agendas and meeting notes that much easier (more on this in a bit).

Make Sure You Really Need a Meeting

It sounds simple, but before you schedule a meeting, ask yourself if you really need one. Can you clearly state your objective and draft an agenda? If not, you may not be prepared to have a meeting. Would an email work instead? A quick IRC conversation?

Include Compete Participation Instructions

Include complete participation instructions every time, even for regular meetings with regular participants. The reason for this is that you want as few barriers to attending your meeting and being on time for it as possible. If someone has to go looking for information on how to participate in the meeting, there is a chance that they will be late or that they won’t attend at all.

Things to consider including in your meeting invite:

  • date and time (including in UTC)
  • physical location (if there is one) and any special access instructions
  • conference/video call information, including complete dial-in number, room number and any required access codes
  • key instructions for using the conference/vidyo call system (e.g. how to mute yourself)
  • direct links to on-line meeting systems
  • if software is required to participate in the meeting, instructions on how to obtain and install it

Don’t assume that participants will have any of the above info readily accessible, even if they have attended your meetings before.

Here’s text that I put at the bottom of every Mozilla meeting invite (some info has been faked, so please don’t use for a real Mozilla meeting):

==============================================================
Connection Details: 

Vidyo 9597 (ckoehler).

+1 650 903 0800, x92 (or +1 800 707 2533, password 000) 
Then 99597 

•1 to mute if you’re dialed in (nb: it makes an audible beep) 

Direct room link: 
https://v.mozilla.com/flex.html?roomdirect.html&key=1234567890 
==============================================================

Note: If you’re a Mozillian and you want non-employees to join your Vidyo meeting, be sure to include the direct link.

Be Mindful of Participants’ Time

Because people’s time is precious, we should be mindful when requesting and utilizing it. There are several aspects to being mindful of your participants’ time:

  • Make sure each participant is really required at the meeting. Each of your participants should have an integral role in obtaining the objective of your meeting. If they don’t, add them as an optional attendee or don’t invite them at all.
  • Be aware of the timezone for each of your participants. When working with a global organization it’s often not possible to find a time that’s convenient for everyone. But you should have some awareness of who is being inconvenienced when, and try to distribute that burden. For example, don’t  schedule every meeting for times that are convenient only for those in Pacific time.
  • Start on-time and end on-time. Most people have multiple meetings per day, and have other things they need to do at certain times. Don’t make others late by conducting a meeting that exceeds its scheduled time. Better yet, strive to end a few minutes early! Most everyone appreciates a few unexpected minutes between commitments to stretch their legs, use the restroom and get some water or coffee. Likewise, be respectful of those who arrive on-time for a meeting by starting on-time. A meeting that starts at the scheduled time is that much more likely to end by the scheduled time.

Take Notes

One of the most important things you can do during a meeting is to ensure that good notes are taken. Taking notes has the following benefits:

  • helps to keep participants focused and on-track during the meeting
  • provides a clear record of what was discussed and decided during the meeting, for reference both by those who attended the meeting and those who were not able to do so

I find it works well for the group to take notes together in the same etherpad I have used for the agenda.  Notes do not have to be a word for word recounting of what was said in the meeting, but should include a summary of the discussion points, questions raised and answers given.

You don’t need to create perfect notes while the meeting is happening. Just record the important information and be prepared to edit afterward.

Follow-Up

A good meeting is not complete until you’ve distributed and recorded the revised meeting notes (or minutes), with key decisions and action items clearly indicated.

The complete agenda and note-taking process looks like this:

  • create and circulate an agenda in advance of the meeting
  • use etherpad (or another collaborative editing tool) whenever possible
  • take notes, with the group’s assistance, in the same document you used for the agenda
  • edit the notes after the meeting is complete, making sure to call out key decisions and action items
  • distribute the edited notes to everyone you invited to the meeting (not just those who actually attended)
  • record the notes in an accessible location (on a public wiki, on your organization’s intranet, etc.)

When I distribute meeting notes, I usually do so via email, with a link to the edited notes and action items included in the actual body of the email.

Your Strategies?

What strategies do you have for running better meetings? Let me know by leaving a comment.