The Internet was ablaze last week with discussion of the hacking of Mat Honan. For those not up to speed about what happened, hackers were able to use social engineering and weaknesses in the security policies of Apple and Amazon to obtain access to Mat’s on-line accounts and to reset all of his Apple devices. Scary stuff!
With this incident on everyone’s mind, I thought it would be a good idea to share the techniques I use to secure my on-line life. I encourage you to adopt these practices if you haven’t already.
Use A Password Manager
My favorite password manager is LastPass. It’s cross-platform and cross-browser. There is a free version and a very affordable premium version at $12/year.
Other options include KeePass and 1Password.
With LastPass, your data is stored online in an encrypted format. To access your information, you unlock your “vault” with a master password. On the desktop, LastPass isn’t a stand-alone program. Rather, you use it as a browser plugin. On mobile platforms there is a stand-alone program that includes an integrated web browser. Because your data is stored online, it is synchronized across and available from multiple computers. This is great if you use more than one system, which I do. LastPass also offers the ability to access your vault when you’re off-line (though two-factor auth is limited in this case).
LastPass allows you to securely store:
- passwords for all your sites
- secure notes, which you can use to store misc information like server logins, credit card and bank account info, passphrases and more
- form data, including credit card information (makes online buying a snap)
It also provides a password generator.
Here’s an example of what it looks like to retrieve passwords in LastPass:
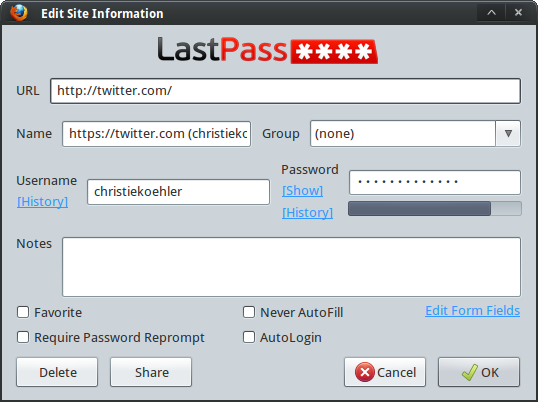
And here’s how I login to sites that I have saved with LastPass:

Using a password manager, be it LastPass, KeePass, 1Password or another solution, allows you to easily follow the best practices I outline below.
Use a Unique, Strong Password for Every Site
You should never re-use a password. Use a unique password for every account that you create everywhere. This limits a security compromise from spreading to one site to another.
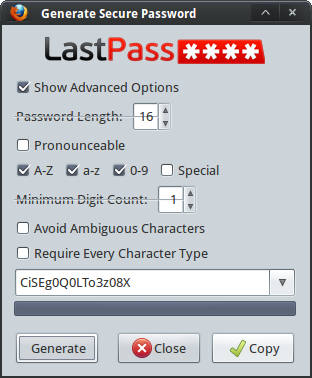
Make sure you pick a strong password. Better yet, use a computer generated password rather than one you make up on your own. Many password managers, including the ones I have mentioned in this post, have a password generator built in. Use it!
Here’s LastPass’ generator:
How Do I Remember All These Unique Passwords?
At this point you might be asking, “how will I remember all these difficult passwords?” You won’t! The only password you’ll need to remember is the master password for your password manager.
Stand-Alone Password Generators
Don’t like or want to use the built-in password generator? There are plenty of stand-alone options.
My favorite password generator is actually the one that ships with OSX. It’s a bit difficult to get to, however, because you have to open the keychain and then click on some additional buttons. However, this app will call the password generate dialog directly.
If you’re on Windows, there’s pwgen-win. If you’re on Linux, try apg or pwgen.
Don’t Use Real Information in Security Questions
Security questions are those additional questions you fill out when you set up web accounts, especially for on-line banking. Some examples:
- childhood nickname
- name of first pet
- first school attended
- place where you met your spouse
- favorite sports team
Most of the security questions I’ve encountered are absolutely terrible in that answering them honestly does nothing to protect your account. Why? Because we live in the age of social networking and answers to these questions are almost always readily available to anyone who’s willing to spend a few minutes searching on Google.
The solution is to provide bogus answers. Favorite Sports Team? The Bangalore Bananas. Or xFLXw99X62ONsPFU. There’s no way someone can use social engineering to come up with answers like these (unless you post them online for some reason). In order for this strategy to work, don’t rely on your memory. Instead, use your password manager to save the security questions and answers just as you do with unique, strong passwords. LastPass makes this particularly easy because on any webpage with a form you can use the “Save All Entered Data” to capture your questions and answers.
Enable Two-Factor (or 2-Step) Authentication Wherever Possible
Two-factor authentication means that in order to login to a site, you need to provide two pieces of information instead of just your password. Most two-factor authentication schemes involve providing your password and a unique code generated by a separate program, usually on a physical device.
For example, when I log in to Google, I first login the usual way and am then prompted for a verification code:

And then I open Google Authenticator on my phone in order to retrieve a special code:

Enabling two-factor authentication adds an extra level of security because it means a hacker can’t login to your account even if they have your password. They’d also have to have the physical device that generates the second authentication factor.
In this post I’ll cover enabling and using two-factor authentication with Gmail and with LastPass.
Enabling Two-Factor Auth for Google
To enable two-factor authentication for your Google account:
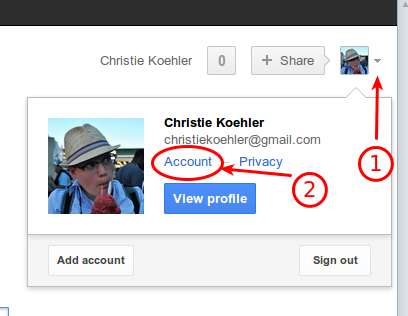
- Login to your account and navigate to your Account page.
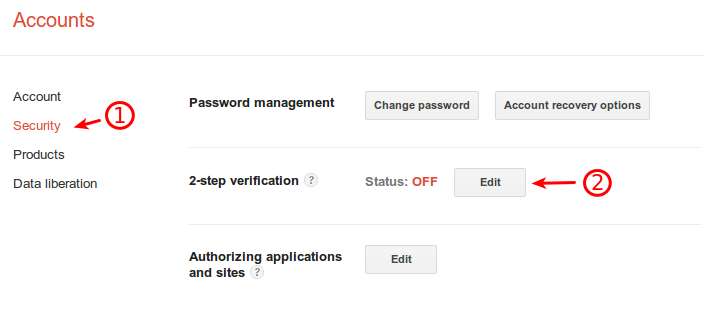
- Navigate to security settings.
- Click ‘edit’ next to 2-step verification.
- If you haven’t already verified you’re phone, you’ll need to do so now.
- After this, 2-step verification will be enabled.
You should now set how to receive your verification codes. You can enable one or more of the following methods:
- Mobile application (Google Authenticator, for Android and iOS)
- Backup phone (not your Google voice number)
- Print backup codes (keep in your wallet or somewhere else safe)
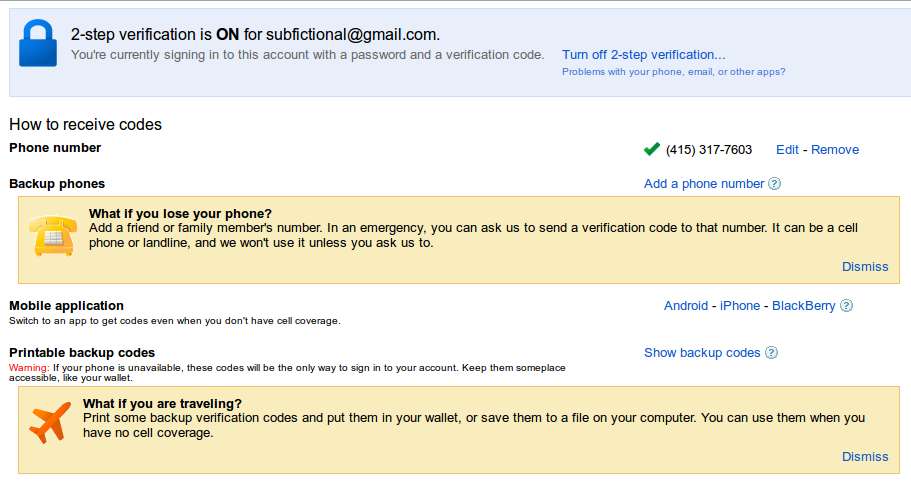
I recommend setting all three, especially if you have a smart-phone or tablet. The method I use most often is the mobile application.
When you select mobile application, you’ll see the following screen. Scan the QR code with your phone or table. You’ll then be given a key to enter into the form to verify your device.
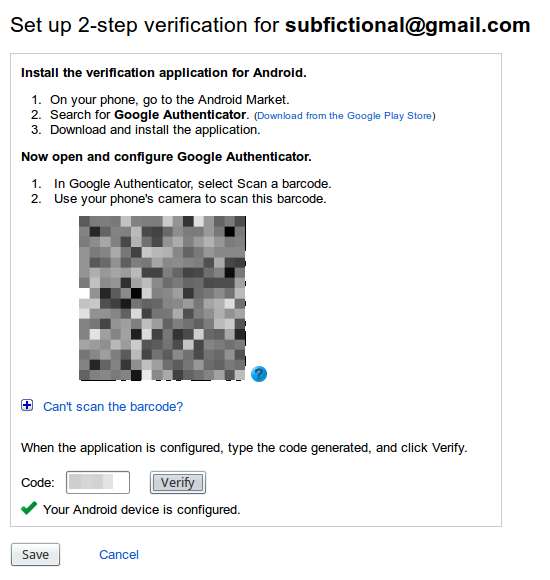
Note: You can install Google Authenticator on multiple devices, but you must do so at the same time. If you wish to add a device later, you’ll need to turn off 2-step authentication and go through the whole process again. You do not need to do this in order to add another Google account to Authenticator, however.
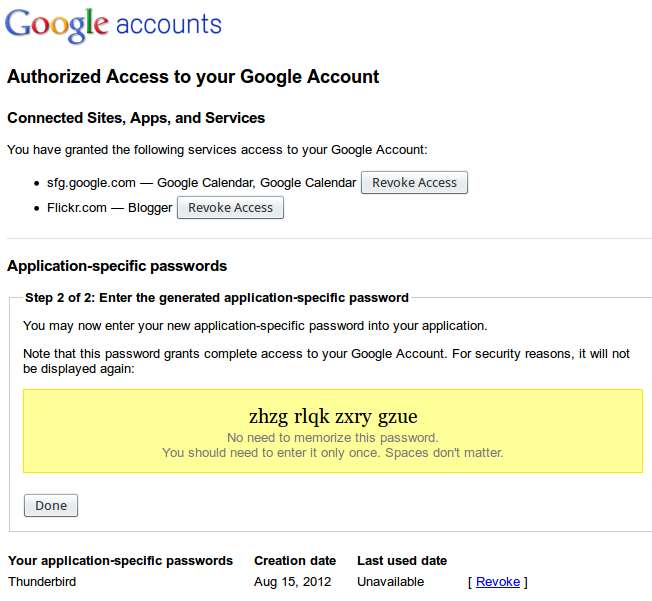
Generating Application-Specific Passwords
What happens if you want to use an email client like Thunderbird, Mail.app or Outlook? Or a chat client with your gTalk? You still can, but you have to generated application-specific passwords. What this means is that for each application you would like to allow to access your mail or chat, you generate a password for. This password is revocable at any time should you loose control of that application (e.g. you loose the laptop on which it’s installed) or suspect that the password has somehow been compromised.
Enabling Two-Factor Auth in LastPass
LastPass offers a few options for two-factor authentication:
- fingerprint reader
- grid authentication
- Yubikey
- Google Authenticator
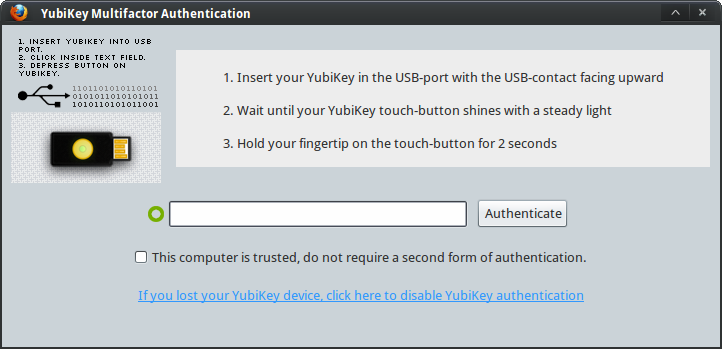
I selected Yubikey. A Yubikey is a USB device that generates a unique, one-time password. Once you link a Yubikey to your LastPass account and enable two-factor authentication, you need to use your Yubikey along with your regular password each time you want to log in (although you can specific which computers are trusted and therefore do not require secondary authentication).
I bought 2 Yubikeys and an additional year of LastPass service for $50. Because you can associate your LastPass account with multiple Yubikeys, I have one for regular use and one for a backup in case I loose the first.
Here’s what it looks like when I log in to LastPass with Yubikey authentication enabled.
First I’m prompted like usual for my LastPass email and password:
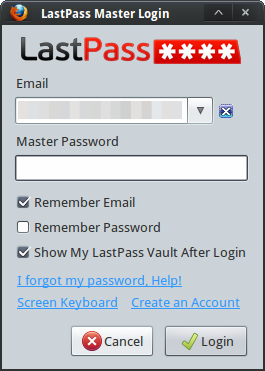
And then prompted from my OTP from Yubikey:
Have a Recovery Email That is Not Easy to Guess and Keep it Private
Both Google and LastPass allow you to specify a recovery email address. I strongly recommend that you setup a second email account that is dissimilar to your regular, public email address, keep it private and use it as the recovery email for your critical accounts (like Google and LastPass). The reason for using a private, separate email is so that hackers are less able to guess your recovery email and be able to launch an attack against it.
Also, if you are uncomfortable having all your on-line eggs in one basket like I am, consider paying for a backup email account from a service like FastMail, HushMail or Pobox.
Change Important Passwords Periodically
You should change the passwords on your critical accounts on a regular basis. Quarterly is probably a good target. Even twice or once a year will be better than never. For best results, link it to some other deadline. Self-employed? Change your critical passwords when you send in your quarterly estimated taxes.
What are critical passwords? Your Google account and password manager, certainly. Probably also your on-line banking, too.
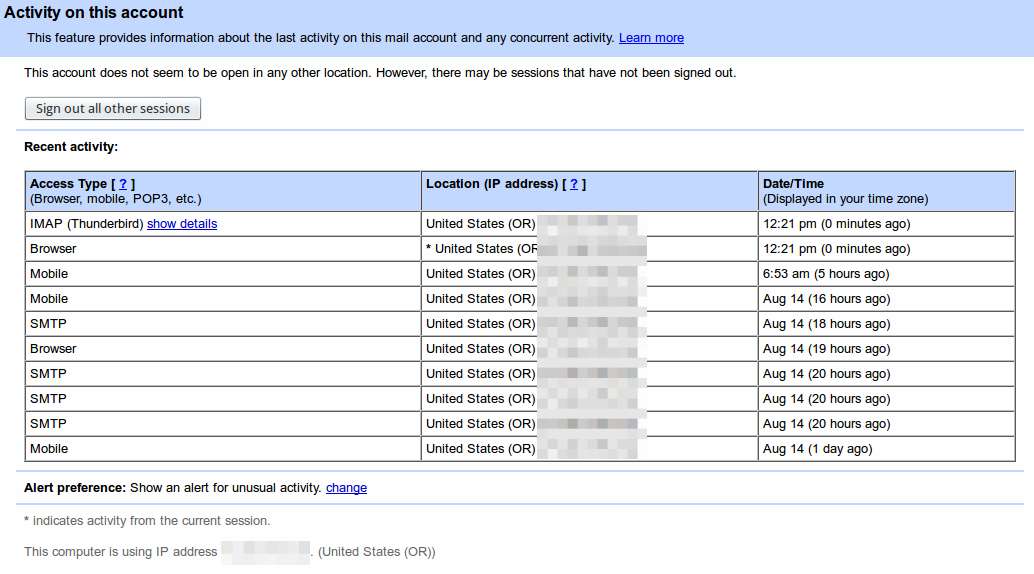
Check Access Logs Frequently
Most systems provide access logs that you are able to check. You should periodically examine this information for anything that seems strange. Look for connections that don’t match your usage because this could be a sign someone is accessing your account without your permission or knowledge.
To see your Google access logs, log in to Gmail, scroll down to the bottom of your inbox and look for “Last account activity.” Then click on details.

You’ll see a screen like this where you can see which IP addresses have been connecting to your account:
Make Regular Backups
The above steps are not a guarantee against your data being compromised. You should make sure you’re regularly backing up any data that’s important to you, including your password information.


